> ## Documentation Index
> Fetch the complete documentation index at: https://docs.lettherebe.app/llms.txt
> Use this file to discover all available pages before exploring further.
# Upscale
> Upscale any chosen shot in LTB to a higher resolution — the same image, sharper — ready as a clean first frame for video or final delivery.
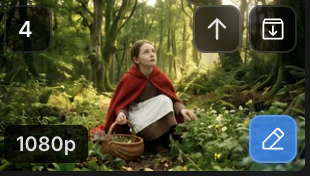
Upscale takes one finished shot and rebuilds it at higher resolution. Same composition, same identity — just more pixels. Use it on a promoted shot before animating, or on a final hero image for delivery.
 ## When to reach for it
* Right before animating a promoted shot — the first frame deserves the cleanest pixels
* Final mastering for delivery, print, or large displays
* A draft image you generated cheaply that now needs to be production-grade
## How to enter
The three edit modes (Edit, Upscale, Cinematic Shots) share two entry paths. Full flow is covered in [Create — image editing](/image-mode/create#refine-before-animating).
* **Path 1** — Click the pencil icon in the bottom-right of any beat gallery tile, then pick `Upscale`.
* **Path 2** — Click `Upscale` in the mode row above the bottom panel, then select a source tile.
## Four resolution options
| Option | Best for |
| ------- | ----------------------------------------- |
| `720p` | HD — quick previews and social cuts |
| `1080p` | Full HD — standard video master |
| `2K` | High-end video master |
| `4K` | Maximum quality — large screens and print |
The token cost shows next to the `Upscale` button before you run. Higher resolution costs more tokens.
## One image, one output
Upscale always produces **one image**. There is no batch size, no candidate grid — the source has already been chosen, so the only variable is target resolution.
Generate beat candidates at low resolution. Promote one shot. Then upscale only the promoted frame. This is the cheapest path to a sharp first frame for the video stage.
## Results land in the beat gallery
The upscaled image returns to the **beat gallery** alongside the source. Promote with `↑` to send it to the shot gallery, or archive with `↓` — identical sort to Create, Edit, and Cinematic Shots.
```
Source shot
↓ Upscale (choose resolution)
Upscaled shot
↓
Beat gallery
├─ ↑ promote → shot gallery → video first frame
└─ ↓ archive
```
## Next
Nine alternative angles for the same beat.
Repaint a region or compose elements from up to three references.
## When to reach for it
* Right before animating a promoted shot — the first frame deserves the cleanest pixels
* Final mastering for delivery, print, or large displays
* A draft image you generated cheaply that now needs to be production-grade
## How to enter
The three edit modes (Edit, Upscale, Cinematic Shots) share two entry paths. Full flow is covered in [Create — image editing](/image-mode/create#refine-before-animating).
* **Path 1** — Click the pencil icon in the bottom-right of any beat gallery tile, then pick `Upscale`.
* **Path 2** — Click `Upscale` in the mode row above the bottom panel, then select a source tile.
## Four resolution options
| Option | Best for |
| ------- | ----------------------------------------- |
| `720p` | HD — quick previews and social cuts |
| `1080p` | Full HD — standard video master |
| `2K` | High-end video master |
| `4K` | Maximum quality — large screens and print |
The token cost shows next to the `Upscale` button before you run. Higher resolution costs more tokens.
## One image, one output
Upscale always produces **one image**. There is no batch size, no candidate grid — the source has already been chosen, so the only variable is target resolution.
Generate beat candidates at low resolution. Promote one shot. Then upscale only the promoted frame. This is the cheapest path to a sharp first frame for the video stage.
## Results land in the beat gallery
The upscaled image returns to the **beat gallery** alongside the source. Promote with `↑` to send it to the shot gallery, or archive with `↓` — identical sort to Create, Edit, and Cinematic Shots.
```
Source shot
↓ Upscale (choose resolution)
Upscaled shot
↓
Beat gallery
├─ ↑ promote → shot gallery → video first frame
└─ ↓ archive
```
## Next
Nine alternative angles for the same beat.
Repaint a region or compose elements from up to three references.